DIY AR-15 Build: Trigger Guard Installation
DIY AR-15 Build: Trigger Guard Installation
- DIY AR-15 Build: Introduction, Parts and Tools Required
- DIY AR-15 Build: Magazine Catch Installation
- DIY AR-15 Build: Bolt Catch Installation
- DIY AR-15 Build: Pivot Pin Installation
- DIY AR-15 Build: Trigger Group Installation
- DIY AR-15 Build: Safety Selector and Pistol Grip Installation
- DIY AR-15 Build: Trigger Guard Installation
- DIY AR-15 Build: Buttstock Installation
Today in part seven of our DIY AR-15 Build you’ll learn how to install a Magpul MOE Trigger Guard into your Lower Receiver.
While installing a trigger guard might not seem to be a very complicated step that warrants it’s own article, there are a few tricks that can help you from making a fatal mistake when assembling your lower.
The ears (pin extensions) that hold the trigger guard roll pin are more fragile than you might think and if care is not taken with this step to find an appropriate multi-level surface, you could potentially wind up breaking one of these off.
If that happens, you might not only be out a lower receiver, but also a $200 tax stamp if you’ve put in to SBR your lower before assembling it. We hope this article will shed a little light on the installation and prevent any catastrophes from happening while you’re assembling your trigger guard.
Continue reading for our step-by-step instructions for installing the Trigger Guard with detailed photos and video.
Trigger Guard Installation
For this step, you won’t be using the trigger guard that’s included with the Stag Arms Lower Parts Kit we recommend, unless you’d like to. The benefit the Magpul MOE Polymer Trigger Guard has over stock trigger guards is the contour and removal of any hard edges that will eventually dig into your fingers after a long day of shooting.
The Magpul Trigger Guards also remove that annoying gap you might have seen at the rear of a standard trigger guard. Not having the gap makes for a more natural roll as you hold the pistol grip. The “V” shape of the MOE also helps finger placement when wearing gloves, as it allows for some extra room.
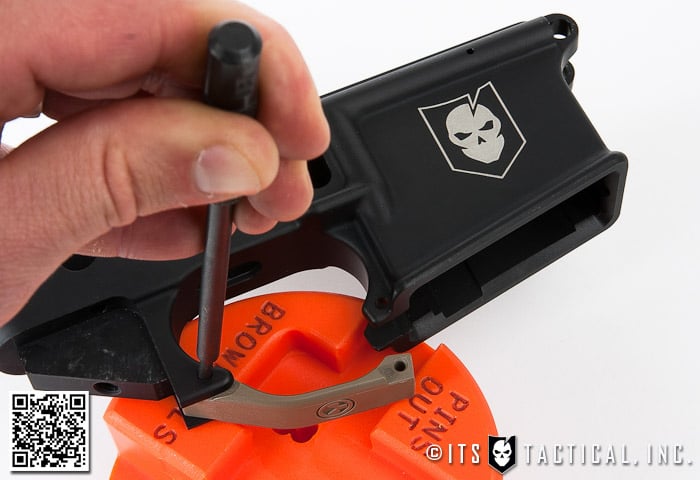
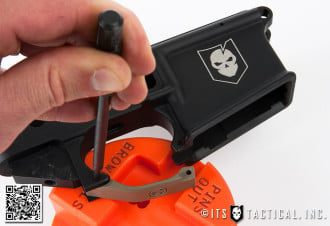
As noted above, a multi-level surface is what’s truly important about this step to ensure disaster doesn’t strike. There are a few options for this, in the video you’ll see that we were able to use the Magpul MOE Stock and the Lower Receiver Vise Block to create this. Alternatively you can also use the Brownell’s Front Sight Bench Block in addition to the Rifle Bench Block. If you already have these blocks, it’s definitely a good way to go, but you don’t need to go out an purchase them just for this step.
You can always create your own multi-level surface out of wood if you want to spend the time. It’s beneficial to create one out of wood if you plan on building many rifles, as it will save you time and headache in the future. The good thing about the Brownell’s blocks though is that they do double duty.
Parts Needed
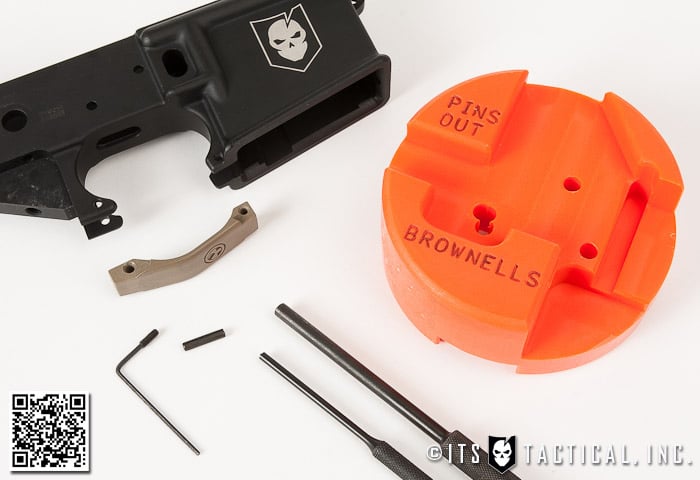
- Front Sight Bench Block and Rifle Bench Block (or similar multi-level surface)
- #4 Roll Pin Punch and #4 Holder (or Standard 1/8″ punch)
- Magpul MOE Trigger Guard
- Included Roll Pin and 1/16″ Hex Key Set Screw and Key
Tools Needed
Assembly Instructions
- Rest your Lower Receiver on the Front Sight Bench Block according to the photo, using it in this fashion will give you the support you need so that you don’t accidentally break off one of the Roll Pin ears on your lower when tapping in the Roll Pin.
- Place the Trigger Guard with the large hole aft; using the #4 Holder, start to tap in the included Roll Pin. Finish tapping the roll pin flush (on both sides) with the #4 Roll Pin Punch. This can also be done without the aforementioned punches, but they do make it easier and prevent misalignment of roll pins.
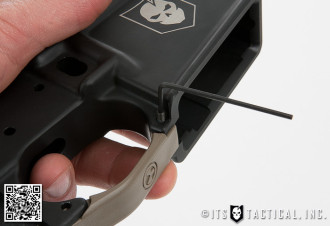
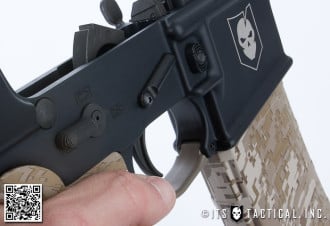
- Finish installing the Trigger Guard by screwing down the front set screw until flush, using a 1/16″ Hex Key.
Join us back here soon for our 8th installment in the DIY AR-15 Build where we’ll be assembling the Buttstock before moving on to the Upper Receiver!



Discussion