Using Google Maps and Android Phones to Scout for Free Campsites
Using Google Maps and Android Phones to Scout for Free Campsites
Earlier this year, I wrote an article for the Art of Manliness on the benefits of dispersed camping outside of established campgrounds and how to use them to launch off to last minute weekend getaways, but the how of finding these campsites deserves a post of its own.
US Forest Service maps are great, but don’t always reveal as much about the terrain as Google Maps can. Here we will use Skynet’s Google’s eyes to help us find a nice off-the-beaten-path campsite.
Scouting for Free Campsites
This article is Android-centric and relies on Android’s turn-by-turn navigation features. Hopefully the ITS staff, most of whom run Apple iOS devices, will be able to chime in with advice on what works well on iPhones. The tech tips herein also assume you have linked up your Android phone with your Google account. Chances are you did this the first time you powered up your phone. If your Gmail, Calendar, Contacts, etc. are the same as when you go to www.gmail.com on your desktop/laptop computer, your Android phone is properly linked to your Google account.
Here’s a step by step on how to search for free campsites from the comfort of your home/office using Google Maps, linking that data to your phone, and finally using Android phone’s turn-by-turn navigation to get you there.
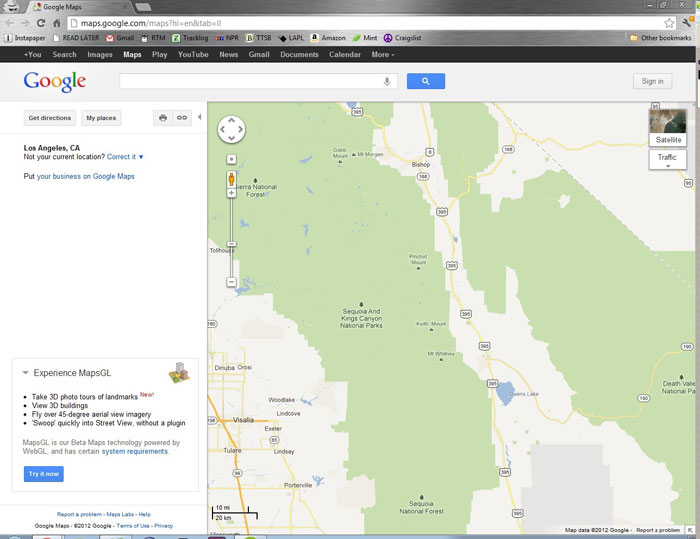
Find the general area where you want to go. In Google Maps, the light green areas are National Parks (NPS), National Forests (USFS) and other public including city and state parks. Keep in mind Bureau of Land Management (BLM) land is not always in green but it is legal to disperse camp there.
National Parks and National Forests often border each other and it may be difficult to discern where the borders are from within Google Maps. In the example above, Sequoia and Kings Canyon National Parks are the green and indiscernible from the neighboring Sequoia, Sierra and Inyo National Forests. In these cases, you can download the map from the respective National Parks (the US Forest Service district maps are difficult to find online) and cross reference the roads to see where the boundary between the NPS and USFS may lay.
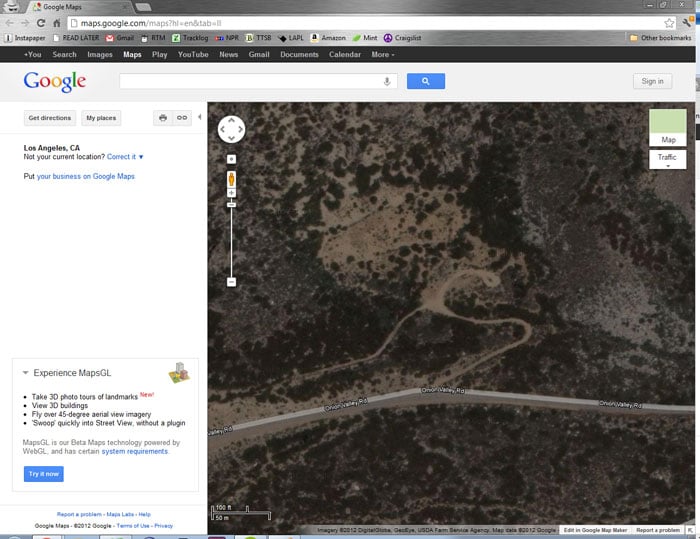
Look for roads that you think you may want to camp near. Forest service roads, the ones with a series of numbers, a letter and then more numbers (such as 5S43,) are typically good bets. Keep in mind you’ll have to zoom in a bit to see many of these roads. Go between satellite view to check if the road is likely a no-go, as private residences like a radio tower, etc., may still exist on public lands and the road will have a high probability of being gated and locked. Also, if it’s in the winter or spring and snow is still present in your area, the roads may be gated and locked, as they’re often not plowed or otherwise maintained. Don’t rely on Google satellite view to indicate presence of snow as the images may be dated.
Scrolling around a bit near a trailhead at 9,000 feet. I want to camp high to acclimate for the hike to 13,000 feet and get an early start. This looks like a good spot!
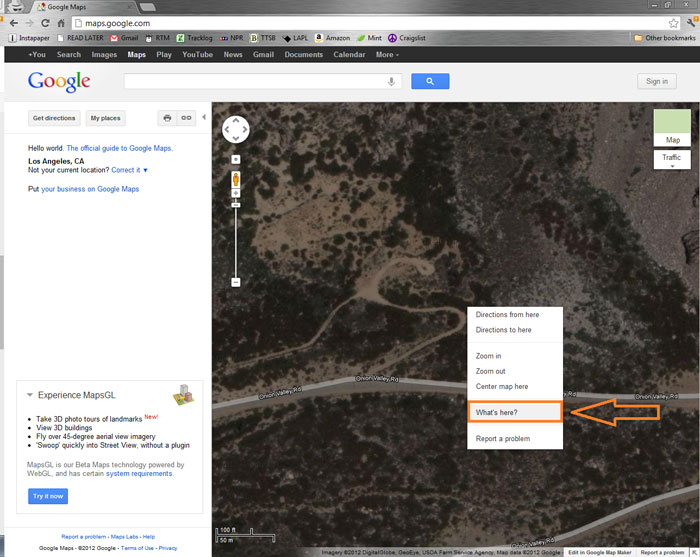
Now for the tricky part. Marking and saving a location in Google Maps is a bit counterintuitive and could stand to be a little more user friendly. Google updates user interface and features on the fly without notice, so keep in mind the instructions here may change slightly over time. Once you have some places you want to scout, here’s how to ‘star’ it to save the coordinates to your Google account.
- Right click on the area you want to mark
- Click “what’s here” on the drop down menu
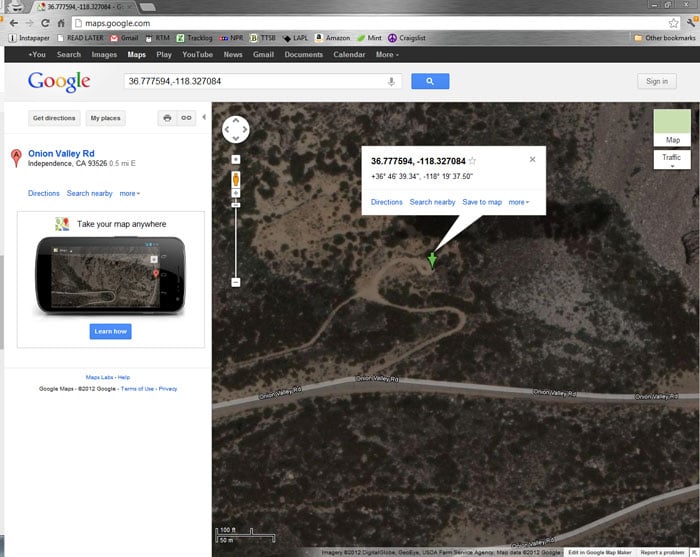
- Now click again on the green arrow (lat/long coordinates will come up in a dialogue box)
- Click the ‘star’ to save the location
You may want to “star” a few more prospective campsites just in case that one is not available. It may be occupied, gated off, or impossible to negotiate terrain to physically access.
Now, review the list of spots you’ve starred in Google Maps by hitting this link: https://www.google.com/bookmarks/ This page can be hard to find from your Google Dashboard, so bookmark it as something like “Google Maps Starred Places.”
Your locations will be named with their respective lat/long coordinates, but it’s better to rename them with sensible nicknames. I find naming them in the order I want to scout them works well. For example, Camp 1, Camp 2 and so on.
Google Maps for Android has an offline mode, but I’ve found it to be somewhat flaky and I don’t trust it completely. However, it doesn’t hurt to have the area saved locally. The maps average at about 70 Mb, so do it while you’re still at home or within WiFi range, as we all know the providers are getting stingy with data these days.
That’s it from the computer side. Now get the rest of your gear packed up (pro tip: don’t forget the toilet paper.)
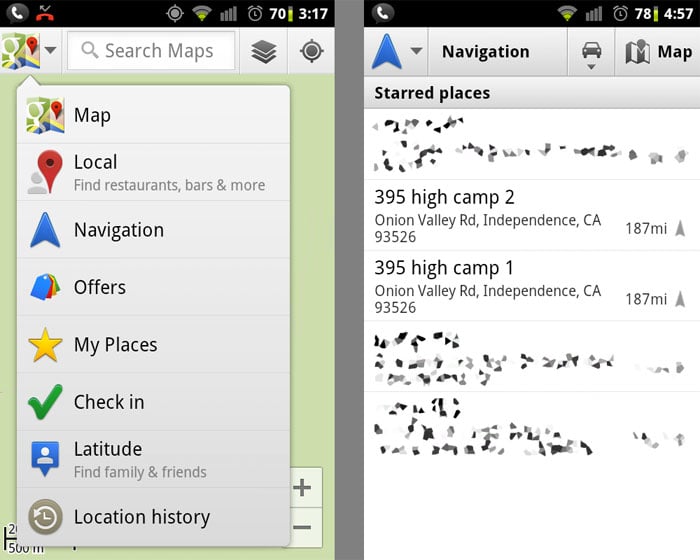
When you’re ready to hit the road, just grab your phone, go to the Maps app and then to “My Places” to see if your spots are there yet. You could also go to “Navigation” then “Starred Places.” If you just starred the locations from your desktop a minute ago, it may take a moment to propagate.
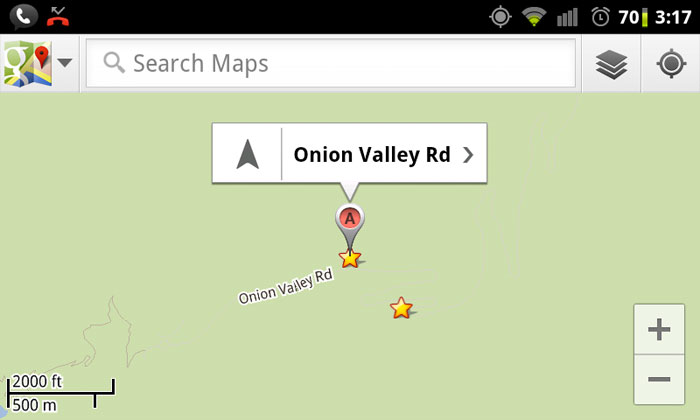
Click on the first camp you wish to navigate to, in this case it’s “395 high camp 1.” You can see on the screenshot that the second star, “395 high camp 2”, is a half mile away.
Click on the little gray arrow to begin navigation. In this case, immediately to the left of “Onion Valley Rd.”
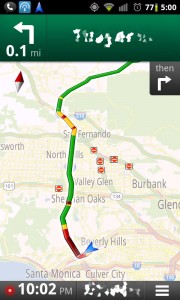 Stupid LA traffic… From here, this should take you to your destination. All this said, it’s best to have a backup plan in case your GPS goes down, especially since this is dependent on a data connection.
We dig our GPS and high tech gizmos for best case scenario, but are firm believers in having a firm foundation in analog navigation. That’s out of the scope of this article, but we have an ITS LandNav 101 archive on the topic if you’d like to brush up.
Good luck, happy camping and remember to leave no trace!




Discussion