- DIY AR-15 Build: Upper Receiver Assembly Introduction
- DIY AR-15 Build: Ejection Port Cover and Forward Assist Installation
- DIY AR-15 Build: Barrel and Free-Float Rail System Installation
- DIY AR-15 Build: Front Sight Base Installation
- DIY AR-15 Build: Muzzle Device Installation
- DIY AR-15 Build – Bolt Carrier Group Installation
- DIY AR-15 Build – Welding and Checking the Headspace
- DIY AR-15 Build: Lubrication, Assembly and Firing
Continuing our DIY AR-15 Build, today we’ll be installing the Gas Tube and F-Marked Front Sight Base onto our Bravo Company 14.5″ Barrel and nearly completing our Upper Receiver.
Something to pay particular attention to at this point is that your gas tube properly fits through the port that’s left in the upper receiver after torquing your barrel nut down. We described this in our last article and it’s a pain to have to take a rail system apart when you find out the hole you thought was aligned, really wasn’t.
The tools and suggestions in this article will help you in the assembly of these components and hopefully save you from the mistakes that we’ve made in the past when working with the AR platform.
Let’s get into the next step in your AR-15 build!
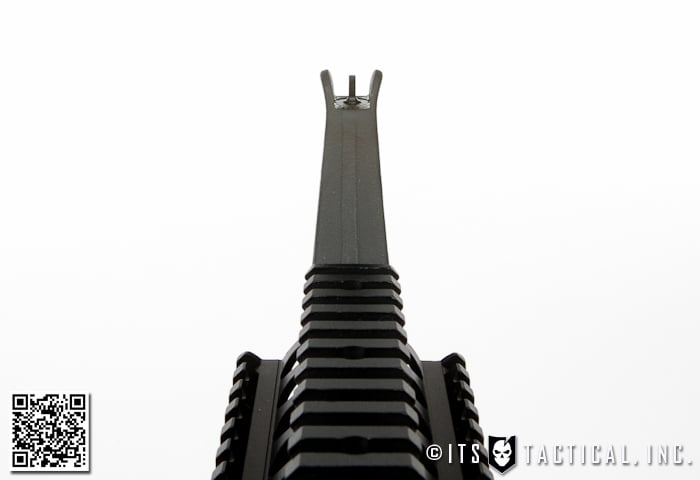
F-Marked Front Sight Base
We highly recommend the F-Marked Front Sight Base from Bravo Company USA if you’re using a Mil-Spec Flat Top Upper Receiver, as it properly aligns the height of the FSB with the Mil-Spec Height of a Rear Iron Sight. The “F” simply means Flat top.
We’ve chosen to show the Front Sight Base install, rather than a Low-Profile Gas Block, as it’s fairly self explanatory to install and there are many different styles. A Low-Profile Gas Block takes the place of a FSB, allowing the Gas Tube to be installed and for the rail to ride “over” the gas block to give the rifle a slick look. A flip-up front sight like the Magpul MBUS will need to be used in conjunction with a Low-Profile Gas Block if a front sight is desired.
Taper Pins
If you’re starting from scratch with this build and are using a Barrel and Front Sight Base that aren’t cut for Taper Pins, you have the option of either using a Low-Profile Gas Block, or taking your barrel to a gunsmith to get these drilled. Please do not attempt this yourself unless you’re confident in what you’re doing. If the Taper Pin holes are mis-drilled/reamed in the barrel and FSB it can cause your FSB to shift and for the AR to lose its zero.
This is one of the main reasons we used a complete Upper Receiver Group from Bravo Company. Most everything is doable by yourself on this AR build with the exception of drilling/reaming the Taper Pin Holes and permanantely attaching/welding the Compensator if you’re using a 14.5″ Barrel as we are (described in the next article).
A 3/32 Taper Pin Starter Punch will not only make the installation of the Taper Pins easier, but will also help if you need to remove them as well. This can be done with standard punches as well, but the Taper Pin Starter Punch makes life easier. Another must is a Front Sight Bench Block, which is conveniently marked with “Pins In” and “Pins Out” to avoid confusion on which side of the FSB to insert the tapered end from and which side to punch out.
Parts Needed
Tools Needed
- #2 Roll Pin Punch
- #2 Roll Pin Holder
- 3/32 Taper Pin Starter Punch
- Front Sight Bench Block
- Ball Peen Hammer (4 oz.)
Assembly Instructions
- Ensure the bend in the Gas Tube is angled up to follow the contour of the barrel.
- Insert the end of the gas tube that has the two holes into the Front Sight Base with the large hole facing down towards the gas port cut into the barrel.
- Use the #2 roll pin punch to align the small hole in the gas tube (cut for the gas tube roll pin) with the front sight base.
- Using the #2 roll pin holder, drive in the gas tube roll pin and finish with the #2 roll pin punch so that it’s flush with the FSB.
- Take the complete FSB and slide it into the rail system, ensuring the gas tube is directed into the hole in the upper receiver.
- Don’t manhandle this step, if the gas tube isn’t going in easily, there may be a problem with the barrel nut alignment.
- Place the FSB into the Front Sight Bench Block with the “Pins In” side facing up.
- The FSB may not fit into the bench block with your rail system, but it’s still important to have the block backing the Taper Pins you’ll drive in.
- Align the FSB holes with the cuts in the barrel (the Taper Pin Starter Punch works well for this).
- Drive the Taper Pins into the FSB, ensuring the smaller end or tapered side is inserted first.
- Once installed, the Taper Pins will stick out slightly on the opposite side of the FSB.
